

Assignment 1_3: Setup CSS and Webfonts
Webfonts
Download the Fonts folder and copy the "fonts" folder as well as the "fonts.css" file into your local site folder (replace the existing folders/files if you already have them in there). Make sure you only copy the "fonts" folder containing the font files and the "font.css" not the "desktop_fonts".
 CSS code:
@font-face {<br />
  font-family: 'ProximaNovaThin';<br />
  src: url('fonts/proximanova-thin-webfont.eot');<br />
  src: url('fonts/proximanova-thin-webfont.eot?#iefix') format('embedded-opentype'), <br>
    url('fonts/proximanova-thin-webfont.woff') format('woff'), <br />
    url('fonts/proximanova-thin-webfont.ttf') format('truetype'), <br />
    url('fonts/proximanova-thin-webfont.svg#ProximaNovaThin') format('svg');<br />
  font-weight: normal;<br />
  font-style: normal;<br />
}
Above: The "fonts.css" file contains a number of CSS Rules (shown is just one of them) that connect/link the font files with so-called font-family declarations. In the end this means that you can display an HTML element in Proxima Nova as soon as you assign the font-family declaration to an element. There are 3 font files per font (".eot", ".woff" and ".ttf"). which is necessary to make it work on all the different browsers (Safari, Chrome, Firefox, Explorer etc.)
Read more about Webfonts in this article.
Create and Link your CSS Files
This will be the code you'll be working with the most. The HTML markup can basically stay the same for all the layouts. Important to understand is the separation between content (HTML) and design (CSS). The same exact content can be designed in many, many different ways. One famous example is the CSS Zen Garden project where people could submit their CSS code styling the same exact HTML markup.
First thing we do is create a CSS file and then link it to our first HTML page. CSS can be embedded inside the HTML document as well but for we'll be focusing on an external, separate style sheet file (the most common usage anyway). Inside Dreamweaver select FILE > NEW for the top menu, select CSS and hit CREATE. Save this blank CSS file right away. Call it "recipe-a.css" and save it into the same folder as your first HTML file. Dreamweaver can help you link the HTML to the CSS. For this open the HTML and select TOOLS > CSS > ATTACH STYLE SHEET. Browse to the CSS file you just created, make sure "Add as Link" is checked and hit OK.
Inside the HEAD section of your HTML, you can now find a new line of code that should look like this:
HTML code:
<link href="recipe-a.css" rel="stylesheet" type="text/css">
If the CSS is linked correctly you can see changes in the layout as soon as you create CSS rules. Dreamweaver has the SPLIT view option where you can see code and browser preview ("Live") simultaneously, which is a very helpful feature.
We also need to link the "fonts.css" to you HTML document. For this you can simple duplicate the line of code above and change it to:
HTML code:
<link href="../fonts.css" rel="stylesheet" type="text/css">
the "../" means that the link is going out of it's directory ("recipe-a" folder) to the "fonts.css" file. This fonts.css files doesn't change so all of your HTML documents can link to the same file (no need to duplicate it).
CSS Reset
If you look at your first HTML document the result should look similar to the example below.
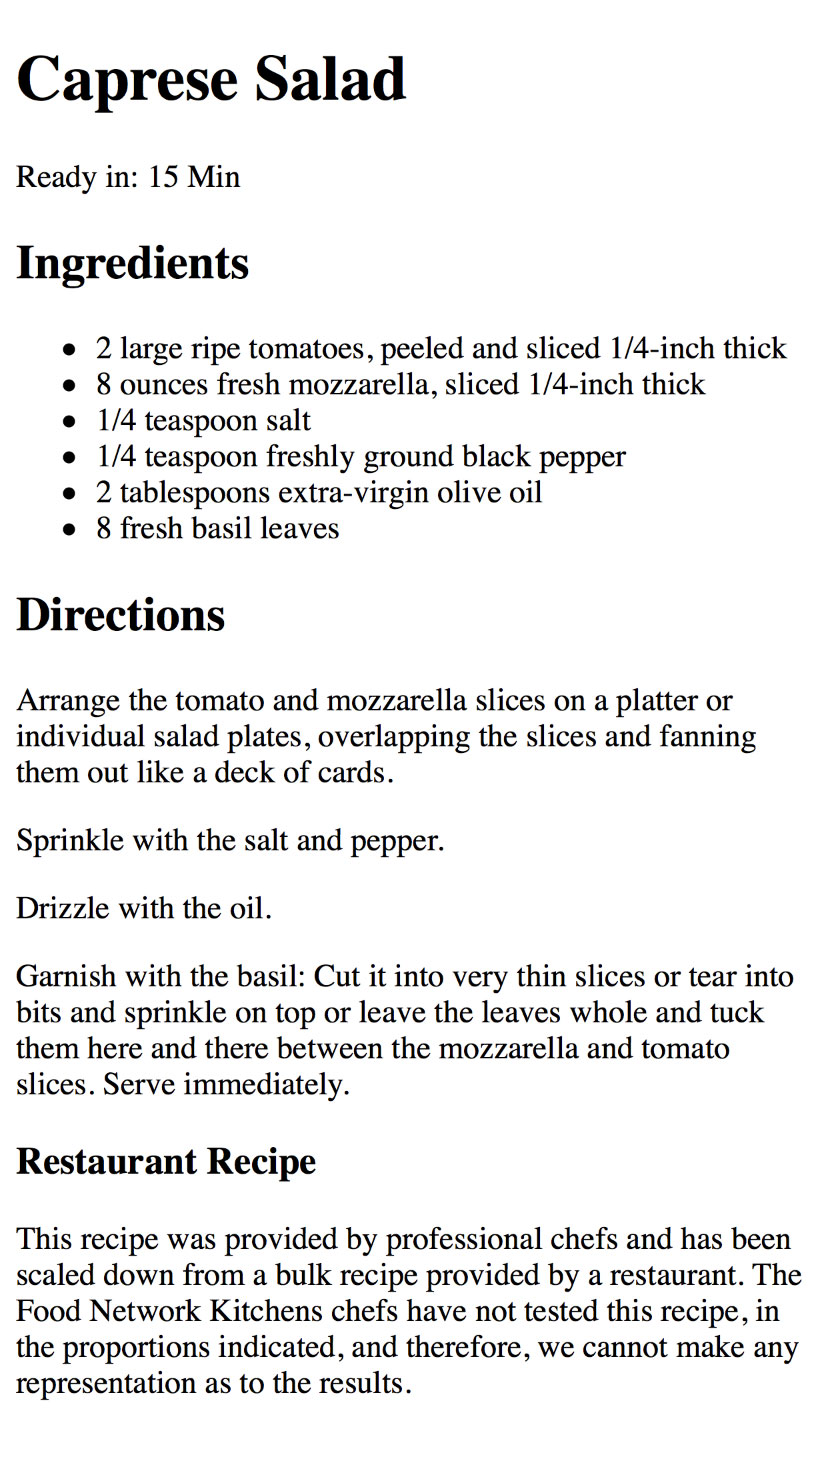
As you can see the browser automatically applies styles to the tags we added: The h1 tag results in the biggest type size, the h2 in a slightly smaller headline etc. Bullet points were applied to the list, Paragraph and other elements have certain spaces applied, and so on. This makes a lot of sense since the HTML page alone should be legible and structured without having to apply CSS styles.
But for our purpose it can be confusing. We want full control over sizes, spaces and extra graphic elements. A way to achieve this is to apply a so called "CSS Reset". Copy the following code and paste it into you CSS file:
CSS code:
html, body, h1, h2, h3, h4, h5, h6, p, ol, ul, li, pre, code, address, variable, form, fieldset, blockquote { <br>
padding: 0; <br>
margin: 0; <br>
font-size: 100%; <br>
font-weight: normal; <br>
} <br>
These a a number of CSS declaration applied simultaneously to several HTML elements. The result in the browser should look like this now:
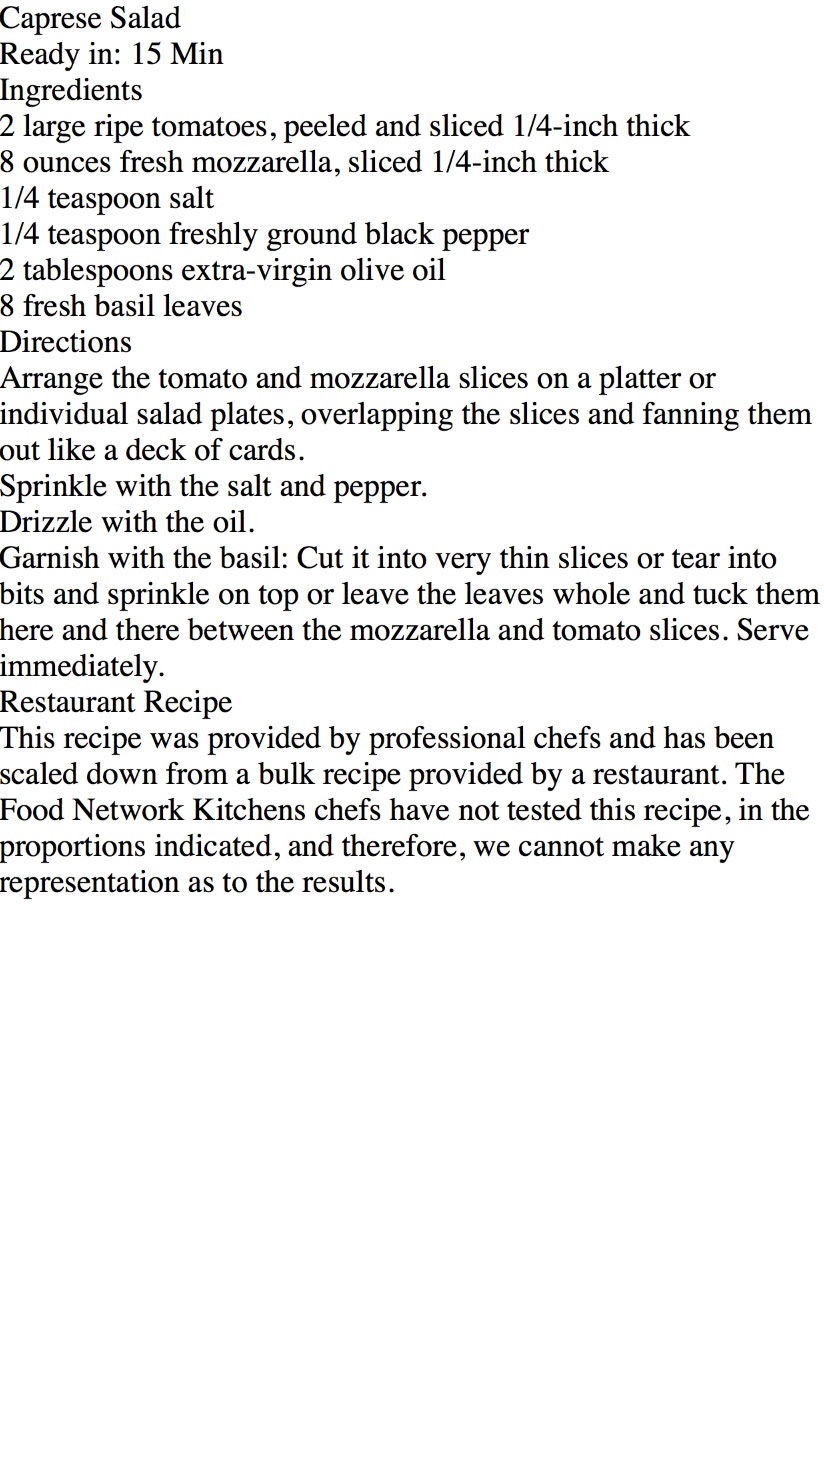
All browser styles have been reset so we can start from scratch with the CSS/design.