

Assignment 1: Preparation
Files and folders
Create a folder hierarchy that matches the example below. We'll be adding the CSS files and the font folder later. Setup this folder structure before you start working with Dreamweaver.


The image above shows the final organization of files and folders. Use your last name for main directory/folder. Dreamweaver refers to this later as the "Local Site Folder" (containing all of your folders, coded files, fonts, HTML, CSS). Place the Local Site Folder somewhere on your hard drive and avoid moving it as long as we're working on this assignment.
Since We'll be creating 6 variations for each assignment all sub folders ("lastname-1_1", lastname-1_2...) contain 6 folders (a-f).
When you're working on a web project you should pay close attention to file names. In general avoid upper case letters and blank spaces. Instead use hyphens or underscores.
Fonts
We'll be using Proxima Nova (all weights available). You can download the Proxima Nova web font folder here. For more about webfonts read this article (For this assignment we'll be embedding fonts using the @Font-Face Rule).
Dreamweaver
Dreamweaver is part of Adobe Creative Cloud and it's likely that you already have access to the software. We'll be using DW as a code editor not as a design tool. So none of the pre-coded, template based featured will be used. Although DW has some useful features such as the side by side code/design views, it's possible to use a different, more affordable code editor instead. If that's the case please let me know.
Create a "New Site" in Dreamweaver and link it with the "Local Site Folder" you created earlier ("lastname" in the example above).
First open Dreamweaver and create a new project by choosing SITE > NEW SITE from the top menu
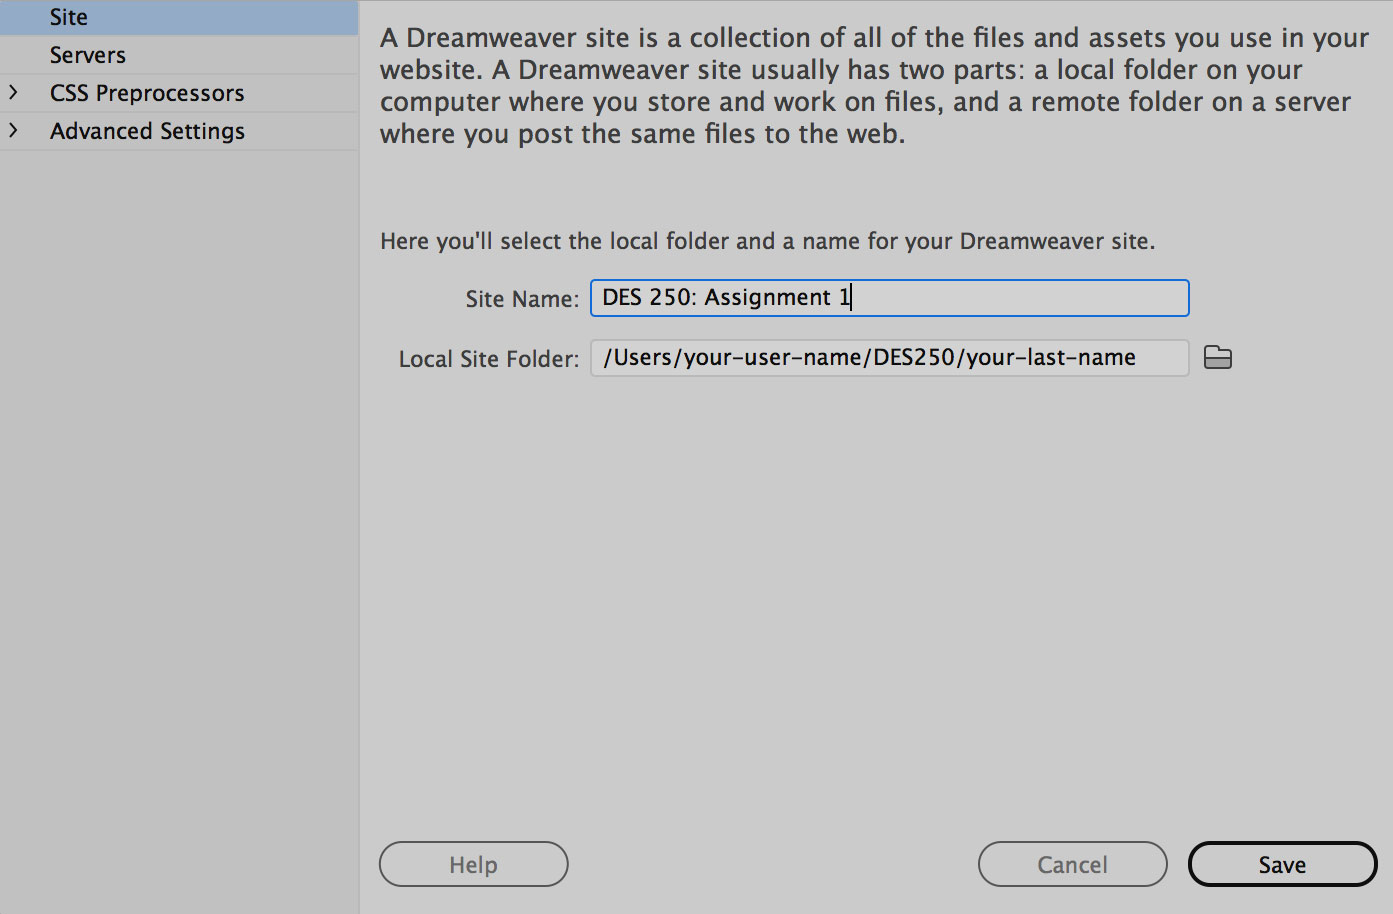
The Site Name identifies Dreamweaver projects. I suggest "DES 250: Assignment 1". Then click the folder-icon to browse to your Local Site Folder. It's important not to move this site folder to a different location on your hard drive after you've done this. The link to the site folder would break. It can be re-linked again but it may cause confusion initially, so better to avoid from the beginning.
Then create a HTML page by choosing FILE > NEW. Select a blank HTML document an hit CREATE.

I'll explain the Dreamweaver basics on the projector during class. After you created the blank HTML save it right away into the first recipe ("recipe-a") folder. Call it "recipe-a.html".
Files Tab
If you "created a site" correctly in DW your Files Tab should look like the example below (without the HTML and CSS files which we'll be adding in next steps). The Files Tab should only show the contents of your site folder:

Dreamweaver Alternatives
If you don't have access to the DW software you can work with any other code editor. Although I haven't been using it yet BRACKETS seems to be a good (and free) alternative. It has a "live view" feature which means that you can simultaneously code and see the result in a browser. You can download BRACKETS here. Since I can't introduce 2 code editors you need to learn how to use it yourself. There's documentation and an intro video on the brackets website. At first glance it seems pretty simple. You really only need to learn how to install it and how to get started.